• Quality Enhancer logoQuality Enhancer
  1. Image Upscaler

Explore the toolkit

All Tools

Jump straight into a focused workspace for improving video or image quality.

Video Enhancer previewVideo EnhancerVideo Upscaler previewVideo UpscalerImage Enhancer previewImage Enhancer
The basics

What Is an AI Image Upscaler?

An AI image upscaler enlarges a photo's pixel dimensions and, with a trained model, estimates plausible edges and texture for the new pixels it adds. That is different from a plain resize, which just stretches existing pixels without adding any new detail, so the enlarged file looks softer and blockier at the new size.

Neither a plain resize nor an AI image upscaler can recover detail the camera never captured in the first place. Treat an AI image upscaler as a way to make an existing photo usable at a larger size or with cleaner texture, not as a way to pull hidden information out of a badly blurred source. Judge the result at the size you actually plan to use it, not just in a zoomed-in crop.

What This AI Image Upscaler Actually Does

An AI image upscaler is only useful if the result holds up at normal viewing size. Here is what this AI image upscaler focuses on, and what it leaves to you to judge.

A Scale Range You Control

This AI image upscaler lets you pick any factor from 2x to 10x instead of forcing a single fixed output. Smaller scales usually look more natural; larger ones matter only when the source supports them.

Detail Reconstruction, Not Just Stretching

A plain resize just stretches existing pixels. This AI image upscaler estimates plausible edges and texture for the new pixels it adds, which is why a trained model looks different from a basic resize at the same size.

Before-and-After Comparison

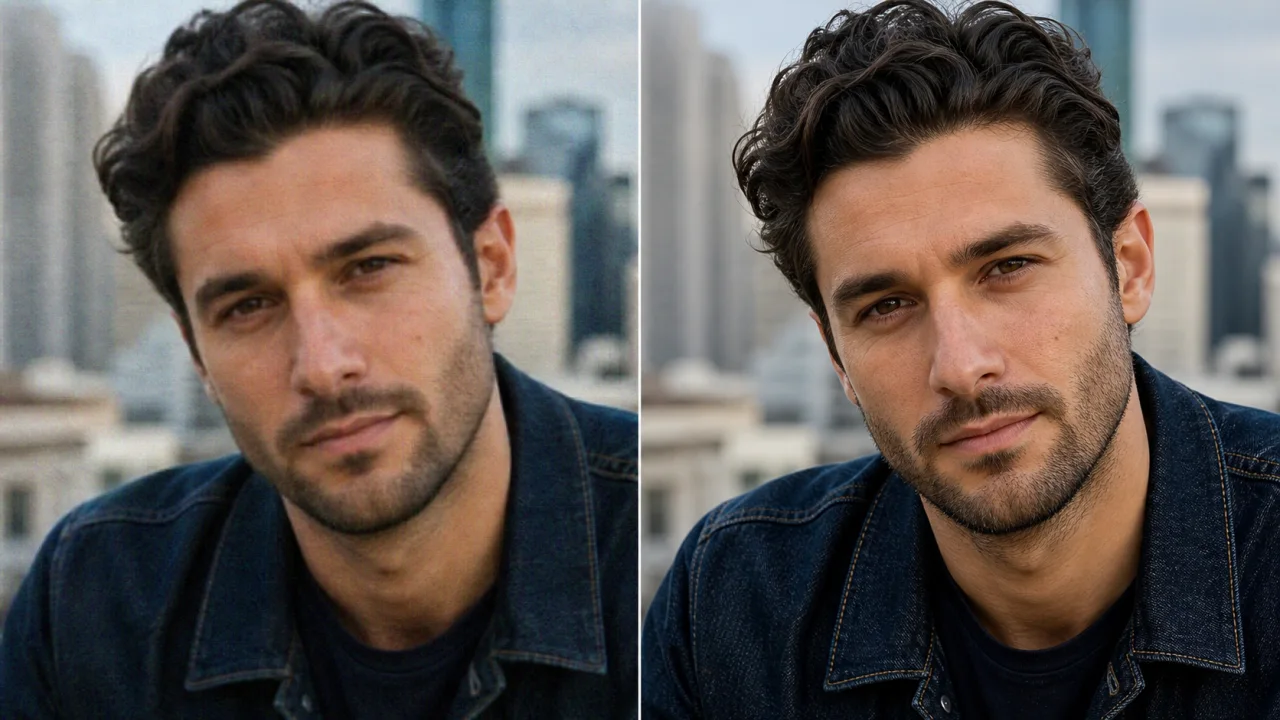
Every run through this AI image upscaler keeps the original visible next to the result, so you can judge faces, text, and fine texture side by side before you commit to a download.

Optional Face Enhancement

Turn on face enhancement when a portrait needs closer attention to skin texture and facial detail. Leave it off for product shots, screenshots, or artwork where it is not relevant. This AI image upscaler applies the setting only to faces, leaving the rest of the frame untouched.

Works Across Photo Types

Portraits, product photos, scanned documents, screenshots, and AI-generated artwork all go through the same AI image upscaler workflow, though each responds a little differently to the same scale.

Privacy Controls You Can Set

Choose whether a result stays private or public, and turn on copy protection before you run the AI image upscaler, rather than adjusting visibility after the fact. Set these before you run the AI image upscaler, not after.

What's included

Account and Credit Requirements

Running this AI image upscaler requires a free account. These are the current rules:

Sign-in
Required to run the AI image upscaler
Cost
2 credits per image, any scale
Free for
Annual and lifetime members
Scale range
2x to 10x
Max input size
About 1.9 megapixels

The credit cost for this AI image upscaler stays the same whether you choose 2x or 10x, so there is no reason to pick a smaller scale just to save credits — pick whichever scale looks most natural for the source instead. Face enhancement and the privacy toggles do not change the cost either. Review these details once; they apply every time you use the AI image upscaler.

By scenario

Enhancing Advice for Specific Kinds of Photos

Different sources fail in different ways. These notes cover the photo types people most often bring to an image enhancer.

01

Upscaling Screenshots and UI Mockups for Presentations

A screenshot captured at a laptop's native resolution can look soft the moment it is dropped into a slide deck or blown up on a conference room screen. Running it through an AI image upscaler enlarges the frame, but text and interface edges are the hardest thing for any AI image upscaler to handle cleanly, since a single misread pixel can turn a crisp label into a smudge.

Treat a screenshot as a demanding test for an AI image upscaler rather than an easy one. Check every piece of on-screen text at the final presentation size before you trust the result, not just the overall layout.

  • •Capture the original screenshot at the highest resolution your display allows before running it through an AI image upscaler.
  • •Zoom into every text label and icon after upscaling — this is where an AI image upscaler is most likely to introduce visible artifacts.
  • •Prefer a smaller scale for UI screenshots; interface edges usually look cleaner at 2x or 4x than at the maximum setting.
02

Upscaling Anime, Manga, and Illustration Art

Illustration and anime-style art is drawn with flat color fields and deliberately clean line work, which behaves differently under an AI image upscaler than a photograph does. A general-purpose AI image upscaler can sometimes blur crisp linework or introduce texture that was never in the original drawing.

Compare a couple of scale settings on the same illustration before committing, since the point at which an AI image upscaler starts to soften line art varies by source and style.

  • •Test a panel with fine line art and flat color separately from one with gradients or shading.
  • •Watch for an AI image upscaler adding texture or grain to areas that were originally flat color.
  • •Keep the original file; illustration work is rarely easy to recreate if a later print or reprint needs a different scale.
03

Enlarging Real Estate and Interior Photos for Listings

Listing photos shot on an older phone or pulled from an agent's archive often fall short of what a modern listing site displays at full width. An AI image upscaler can enlarge them, but interiors are full of straight lines — door frames, window edges, floor seams — that make distortion easy to spot if the AI image upscaler oversharpens them.

Review a listing photo at the exact width your site displays it, since interior shots are usually viewed large and lingered on more than a typical product photo.

  • •Check straight architectural lines first; they reveal distortion faster than textured surfaces do.
  • •Run a moderate scale through the AI image upscaler rather than the maximum, since interiors rarely need 10x to look sharp online.
  • •Compare the AI image upscaler result at the listing site's actual display width, not just in a full-screen preview.
04

Fixing Low-Resolution Downloads From Social Media and Messaging Apps

Photos forwarded through messaging apps or re-downloaded from social media are usually already compressed once by the platform before you ever see them. Pointing an AI image upscaler at a file like this enlarges whatever compression artifacts are already present, so the result will look cleaner than the source but rarely as clean as the original camera file would have.

Set expectations accordingly: an AI image upscaler improves a compressed download, it does not undo the platform's own compression.

  • •Ask for the original camera file if it is available; it will respond to an AI image upscaler better than a re-compressed copy.
  • •Expect some residual blockiness in heavily compressed areas even after upscaling — that is the honest limit of the source.
  • •Compare the AI image upscaler result at normal viewing size rather than zoomed in, where compression artifacts look worse than they do in context.
05

How Much Scale Does a Specific Display or Print Actually Need?

Picking the largest scale an AI image upscaler offers is rarely the right default. A larger scale only helps when the source has enough real detail to support it and when the final display or print is actually big enough for the difference to matter.

Work out the pixel dimensions your target display or print size needs before choosing a scale. An AI image upscaler set to 10x on a photo destined for a small social post produces a bigger file with no visible benefit.

  • •Calculate the target pixel dimensions from your display size or print size and resolution before running the AI image upscaler.
  • •Compare 2x, 4x, and a larger AI image upscaler scale on the same photo rather than defaulting to the maximum.
  • •Remember the credit cost is the same at every scale, so pick based on how the result looks, not the price.
06

AI Image Upscaler vs. Manual Photoshop Upscaling: What Changes

Manual upscaling in Photoshop generally relies on interpolation methods like bicubic resizing, which smooth existing pixels but do not invent new detail. An AI image upscaler takes a different approach: a trained model estimates plausible texture and edges for the pixels it adds, which is why it can look sharper at the same scale than a manual resize.

That does not make an AI image upscaler strictly better in every case — a skilled editor doing manual, selective sharpening still has more fine-grained control than an automated pass. For a quick result without manual editing, an AI image upscaler is usually the faster and more consistent choice.

  • •Compare an AI image upscaler result against a manual bicubic resize on the same photo to see the difference directly.
  • •Reach for manual editing, not the AI image upscaler, when you need selective control over one part of the image.
  • •Use an AI image upscaler as the fast first pass, then fine-tune manually only if the automated result needs it.
Quality check

How to Tell Whether the AI Image Upscaler Result Helped

A single zoomed-in crop is not enough evidence that an AI image upscaler helped. Review the full image at the size you intend to use it before deciding.

Signs the result is useful

  • Skin, fabric, and fine texture look natural at normal viewing size after the AI image upscaler runs, not just in a zoomed-in crop.
  • Edges stay crisp without a visible outline or halo that was not in the source.
  • Small text and logos stay legible instead of becoming distorted or garbled.
  • Colors and gradients stay smooth and consistent, without banding or an obvious shift.

Reasons to reject or redo it

  • Skin or fabric looks plastic, overly smooth, or waxy after the AI image upscaler runs.
  • Edges show ringing or a hard outline that was not present in the original.
  • Small text or logos become harder to read rather than clearer.
  • Flat color areas or gradients develop visible bands or an unnatural color shift.

AI Image Upscaler Frequently Asked Questions

Formats, account requirements, and realistic results — the practical questions people ask before running this AI image upscaler.

Try the AI Image Upscaler on Your Own Photo

Sign in, upload a photo, and compare the AI image upscaler result before you download it. The credit cost is the same from 2x to 10x.

Open the AI Image UpscalerRead the FAQ

AI Image Upscaler for Sharp 2x to 10x Results

This AI image upscaler enlarges a photo and reconstructs plausible edges and texture as it goes. Upload a source, choose a scale, and compare the AI image upscaler result before you download it.

Try the AI Image Upscaler
See What It Does
video2x creator avatar
Zara avatar
LIVE
5.0
fast

from 99+ happy users•30+ verified reviews

Active nowVerified

Run the AI Image Upscaler on Your Photo

Upload a photo and let this AI image upscaler enlarge it from 2x up to 10x. Review the before-and-after result, then download the version that looks right at the size you actually need.

Click to upload or drag and drop your image here

4x
2x10x

Enhance facial details using GFPGAN technology

Public visibility
Copy protection

Upscaled Result

AI Image Upscale Example - After
AI Image Upscale Example - Before
Before
After

Who Actually Needs an AI Image Upscaler?

Three situations where people reach for an AI image upscaler most often, and what to check in each one before you trust the result.

Bring an Old or Compressed Photo Back to a Usable Size - After
Bring an Old or Compressed Photo Back to a Usable Size - Before
Before
After
📸 Photographers

Bring an Old or Compressed Photo Back to a Usable Size

Cameras and early phones often saved photos at resolutions that look small on a modern screen, and a web download adds its own compression on top. Running one of these through an AI image upscaler can make it usable again, but the AI image upscaler is reconstructing plausible detail, not recovering what the camera never captured — so judge the result at the size you actually plan to display it, not just at a glance.

  • Enlarge an old or compressed photo with an AI image upscaler
  • Compare the source and the AI image upscaler result side by side
  • Pick a scale from 2x to 10x instead of one fixed output
  • Check faces and fine texture before you trust a large scale
  • Download once the result looks right at normal size
Upscale a Photo
Make a Supplier Photo Look Right at Listing Size - After
Make a Supplier Photo Look Right at Listing Size - Before
Before
After
🛒 E-commerce Sellers

Make a Supplier Photo Look Right at Listing Size

Supplier catalogs and early product shots often arrive smaller than a marketplace listing actually needs. An AI image upscaler can meet that minimum size, but a listing photo has to survive a shopper zooming in, so review edges, fabric texture, and any printed text on the packaging after the AI image upscaler finishes, not just the overall sharpness.

  • Meet a marketplace's minimum pixel size with an AI image upscaler
  • Keep packaging text and logos legible after enlarging
  • Check color consistency against the physical product
  • Process one photo at a time through a clear review step
  • Download a result sized for your actual listing requirement
Upscale a Product Photo
Prepare AI or Digital Art for a Larger Use - After
Prepare AI or Digital Art for a Larger Use - Before
Before
After
🎨 Digital Artists

Prepare AI or Digital Art for a Larger Use

Art generated at a small, fixed resolution often needs to be larger for a print, a banner, or a high-resolution display. An AI image upscaler can enlarge that artwork, but a scale that is too aggressive can smooth over brushwork and line art the way it would smooth over skin texture in a portrait, so compare a couple of scales on the same piece before picking one.

  • Enlarge AI-generated or digital art with an AI image upscaler
  • Compare 2x, 4x, and a larger scale on the same artwork
  • Check line art and brush texture for over-smoothing
  • Keep the original file in case a later use needs it again
  • Download the scale that looks most natural, not the largest one
Upscale Artwork